一、安装protobuf
下载连接:protobuf-cpp-3.21.12
1.1、ubuntu安装
tar -zxvf protobuf-cpp-3.21.12.tar.gz

cd protobuf-cpp-3.21.12

sudo apt install automake libtool curl make g++ unzip

./autogen.sh

./configure

make -j$(nproc)

sudo make install

sudo Idconfig
2.1、windows安装
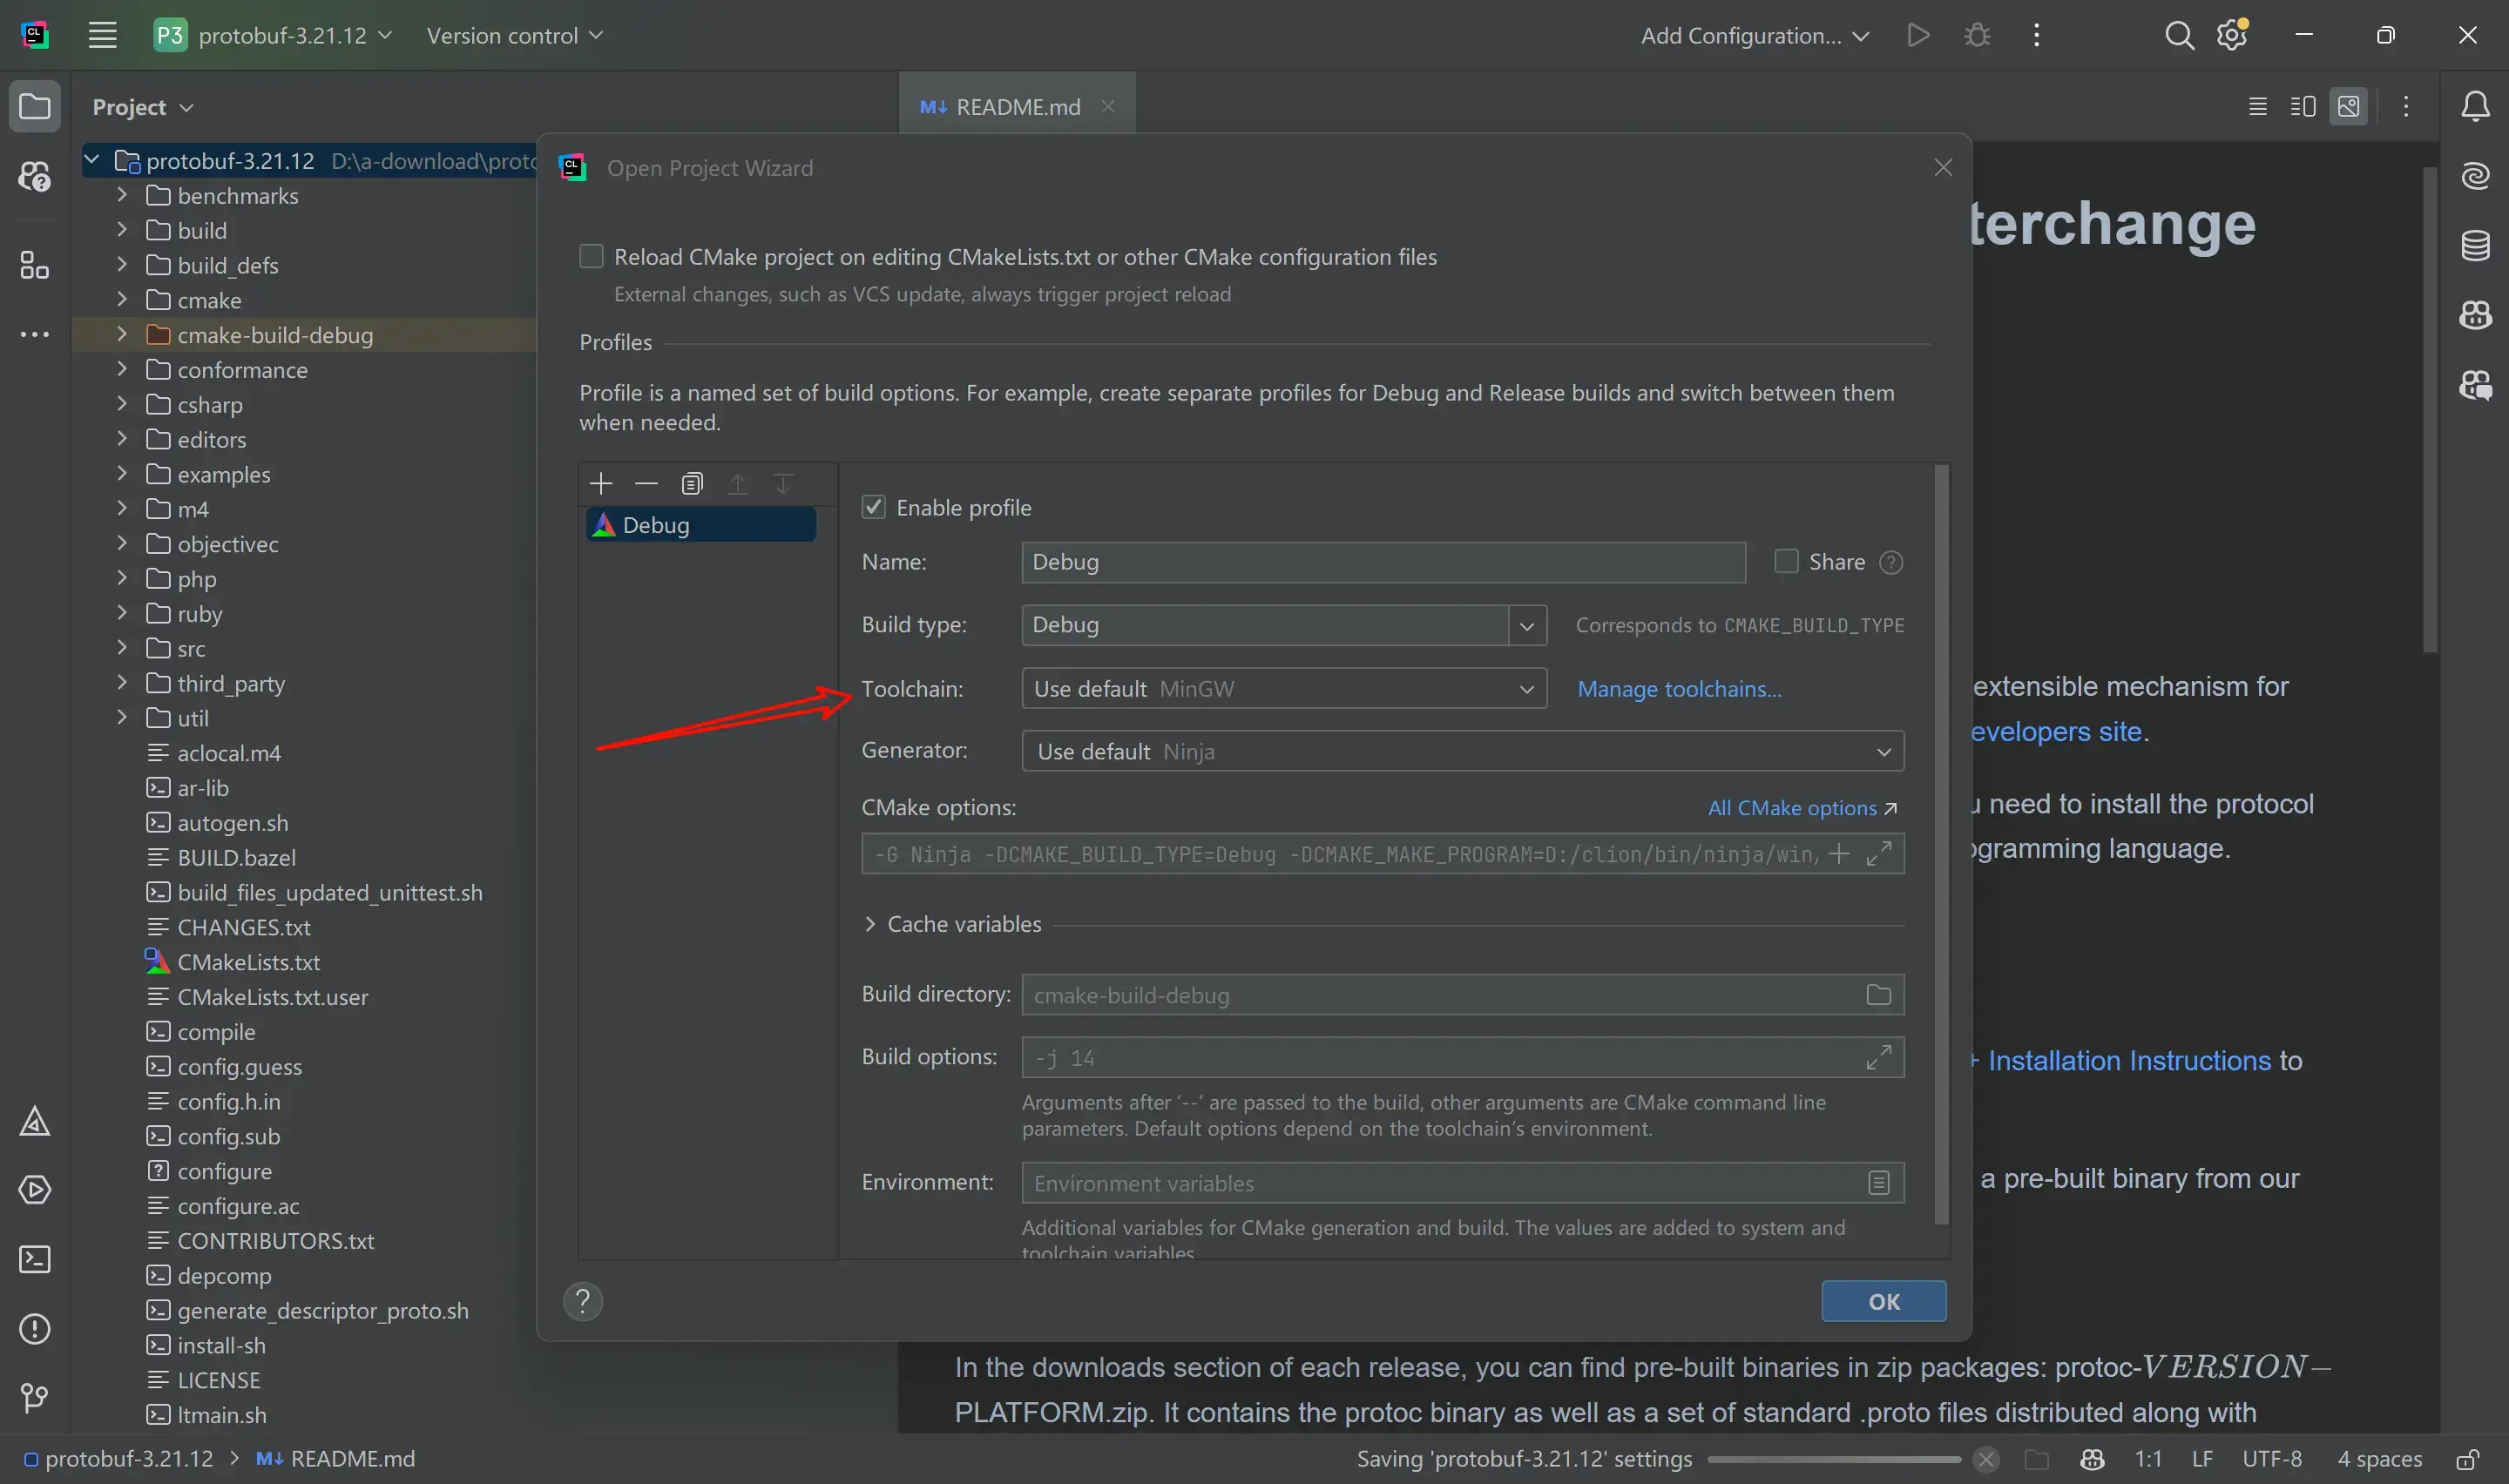
使用Clion打开protobuf项目,根据需要选择编译套件

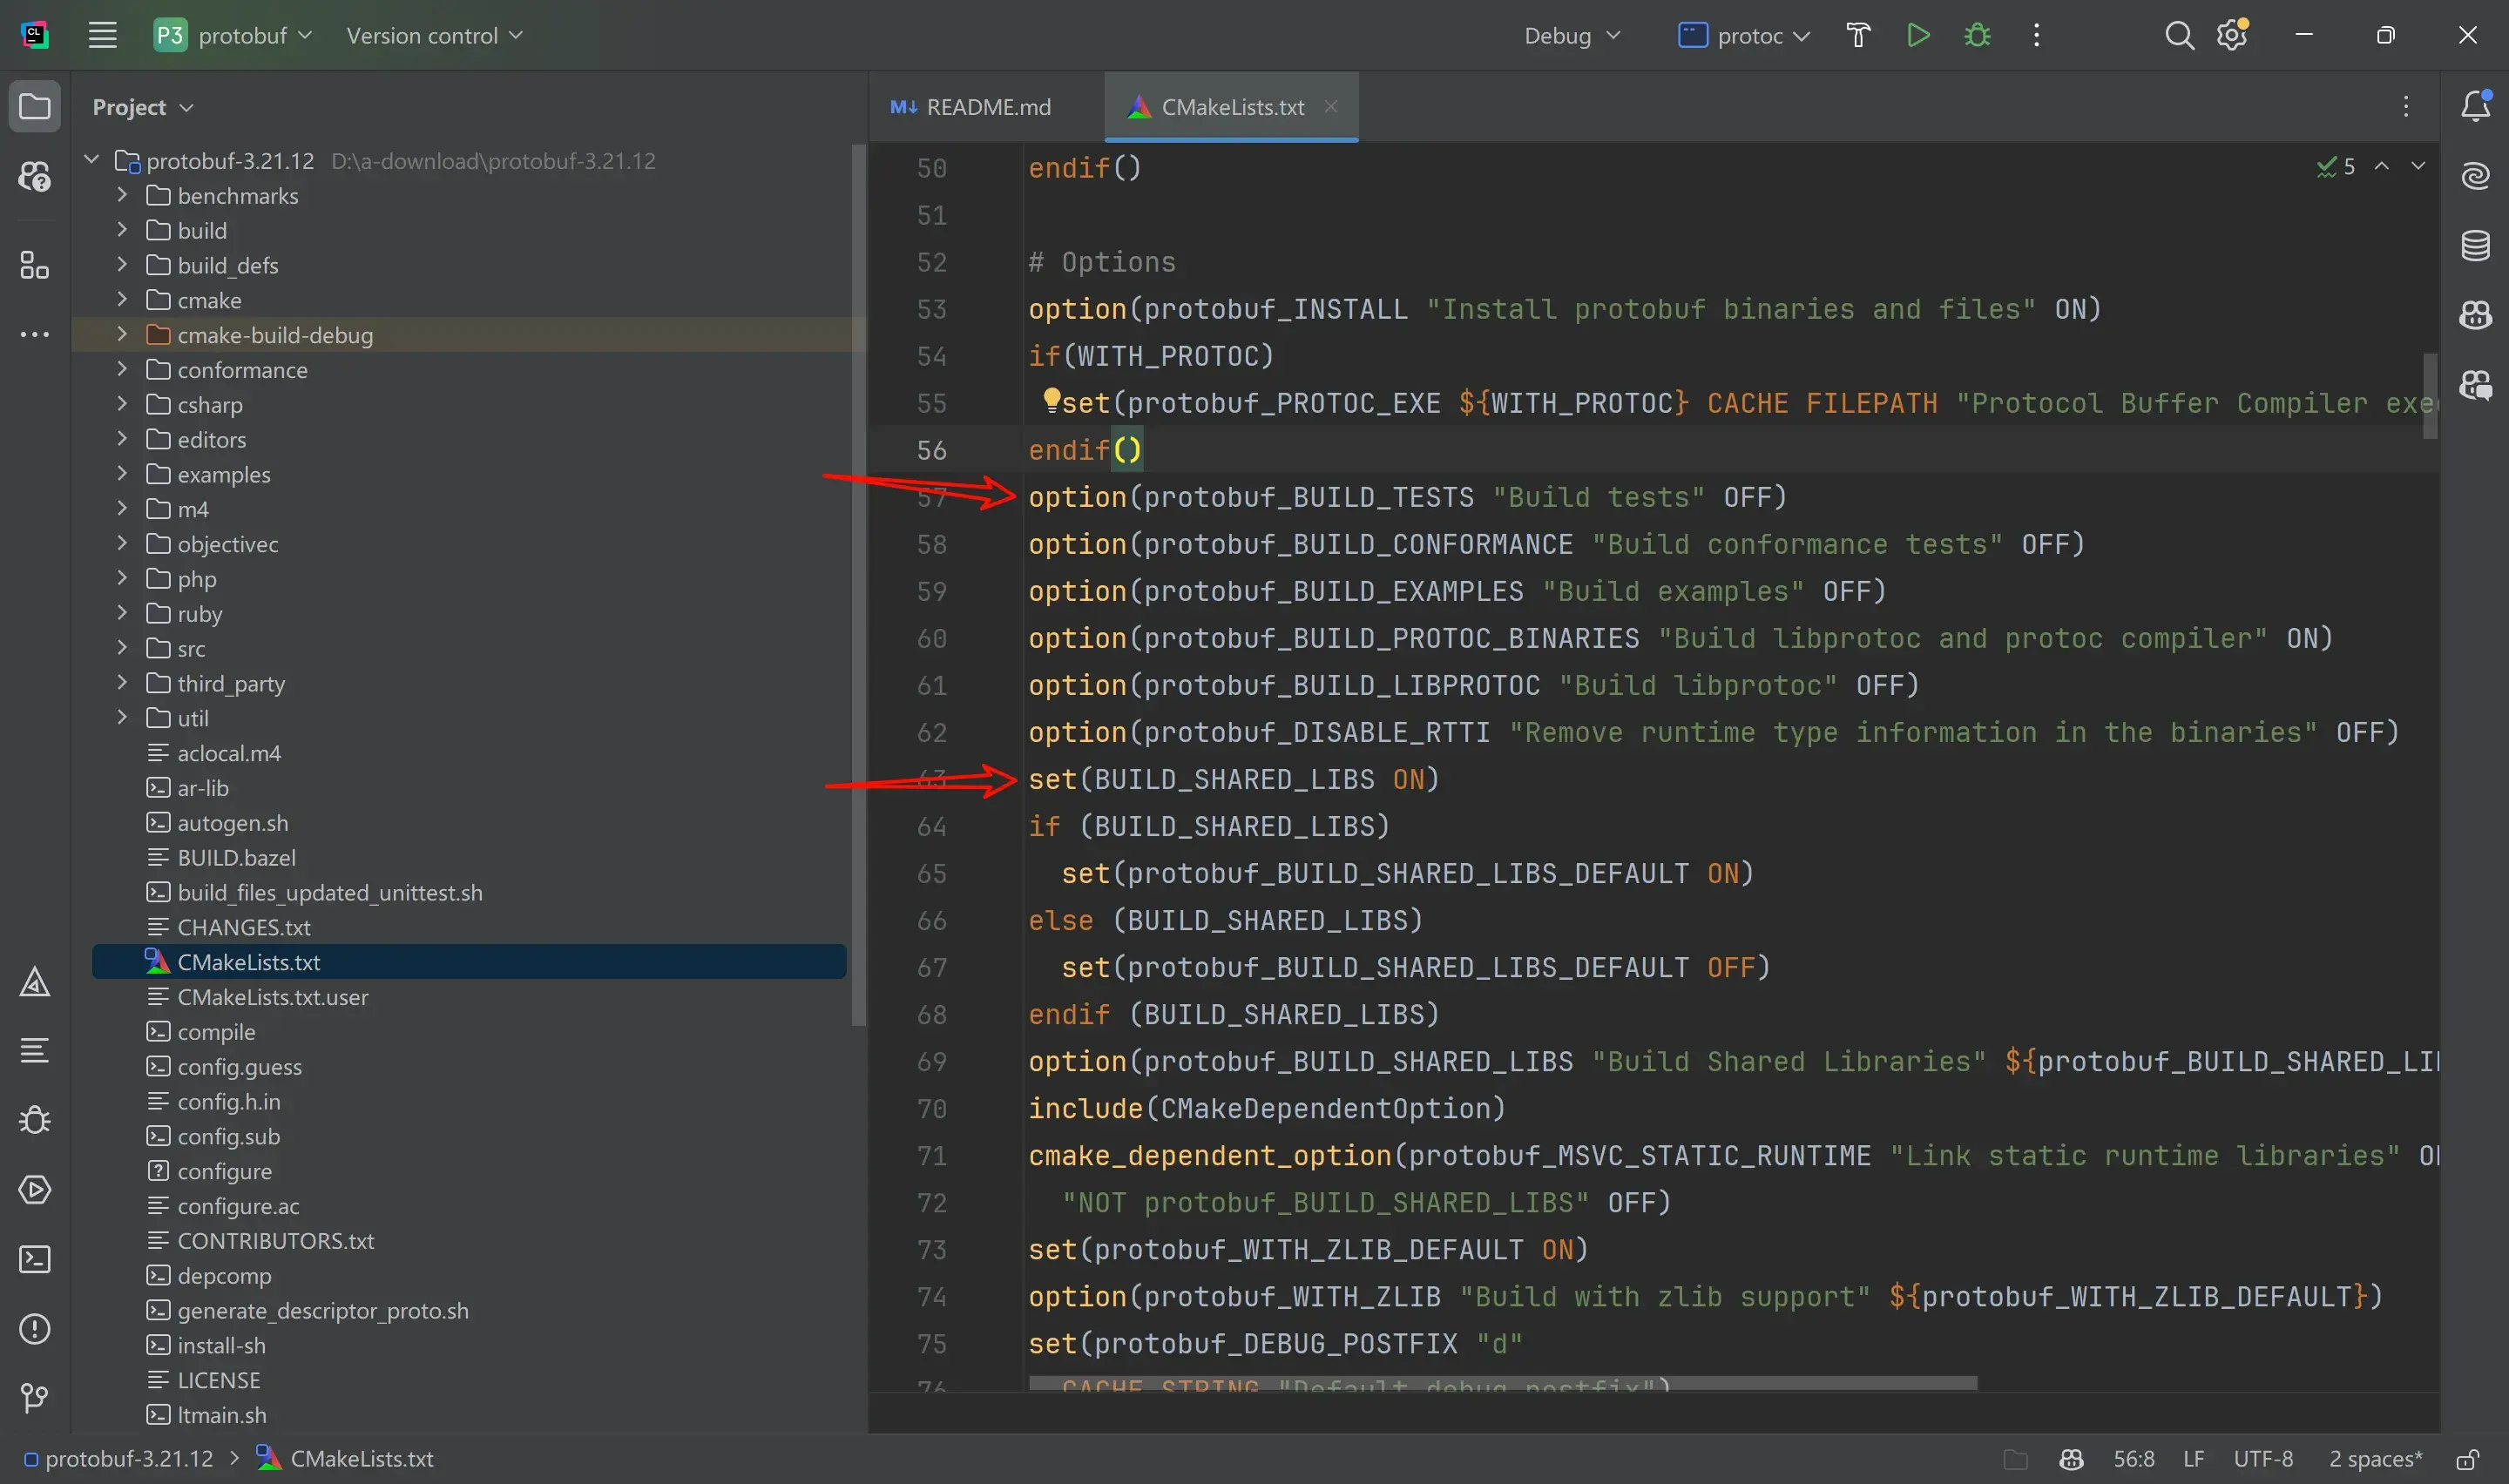
打开根目录下的CMakeLists.txt文件
- 修改
protobuf_BUILD_TESTS为OFF,取消编译测试代码 - 添加
set(BUILD_SHARED_LIBS ON),用于生成动态库文件

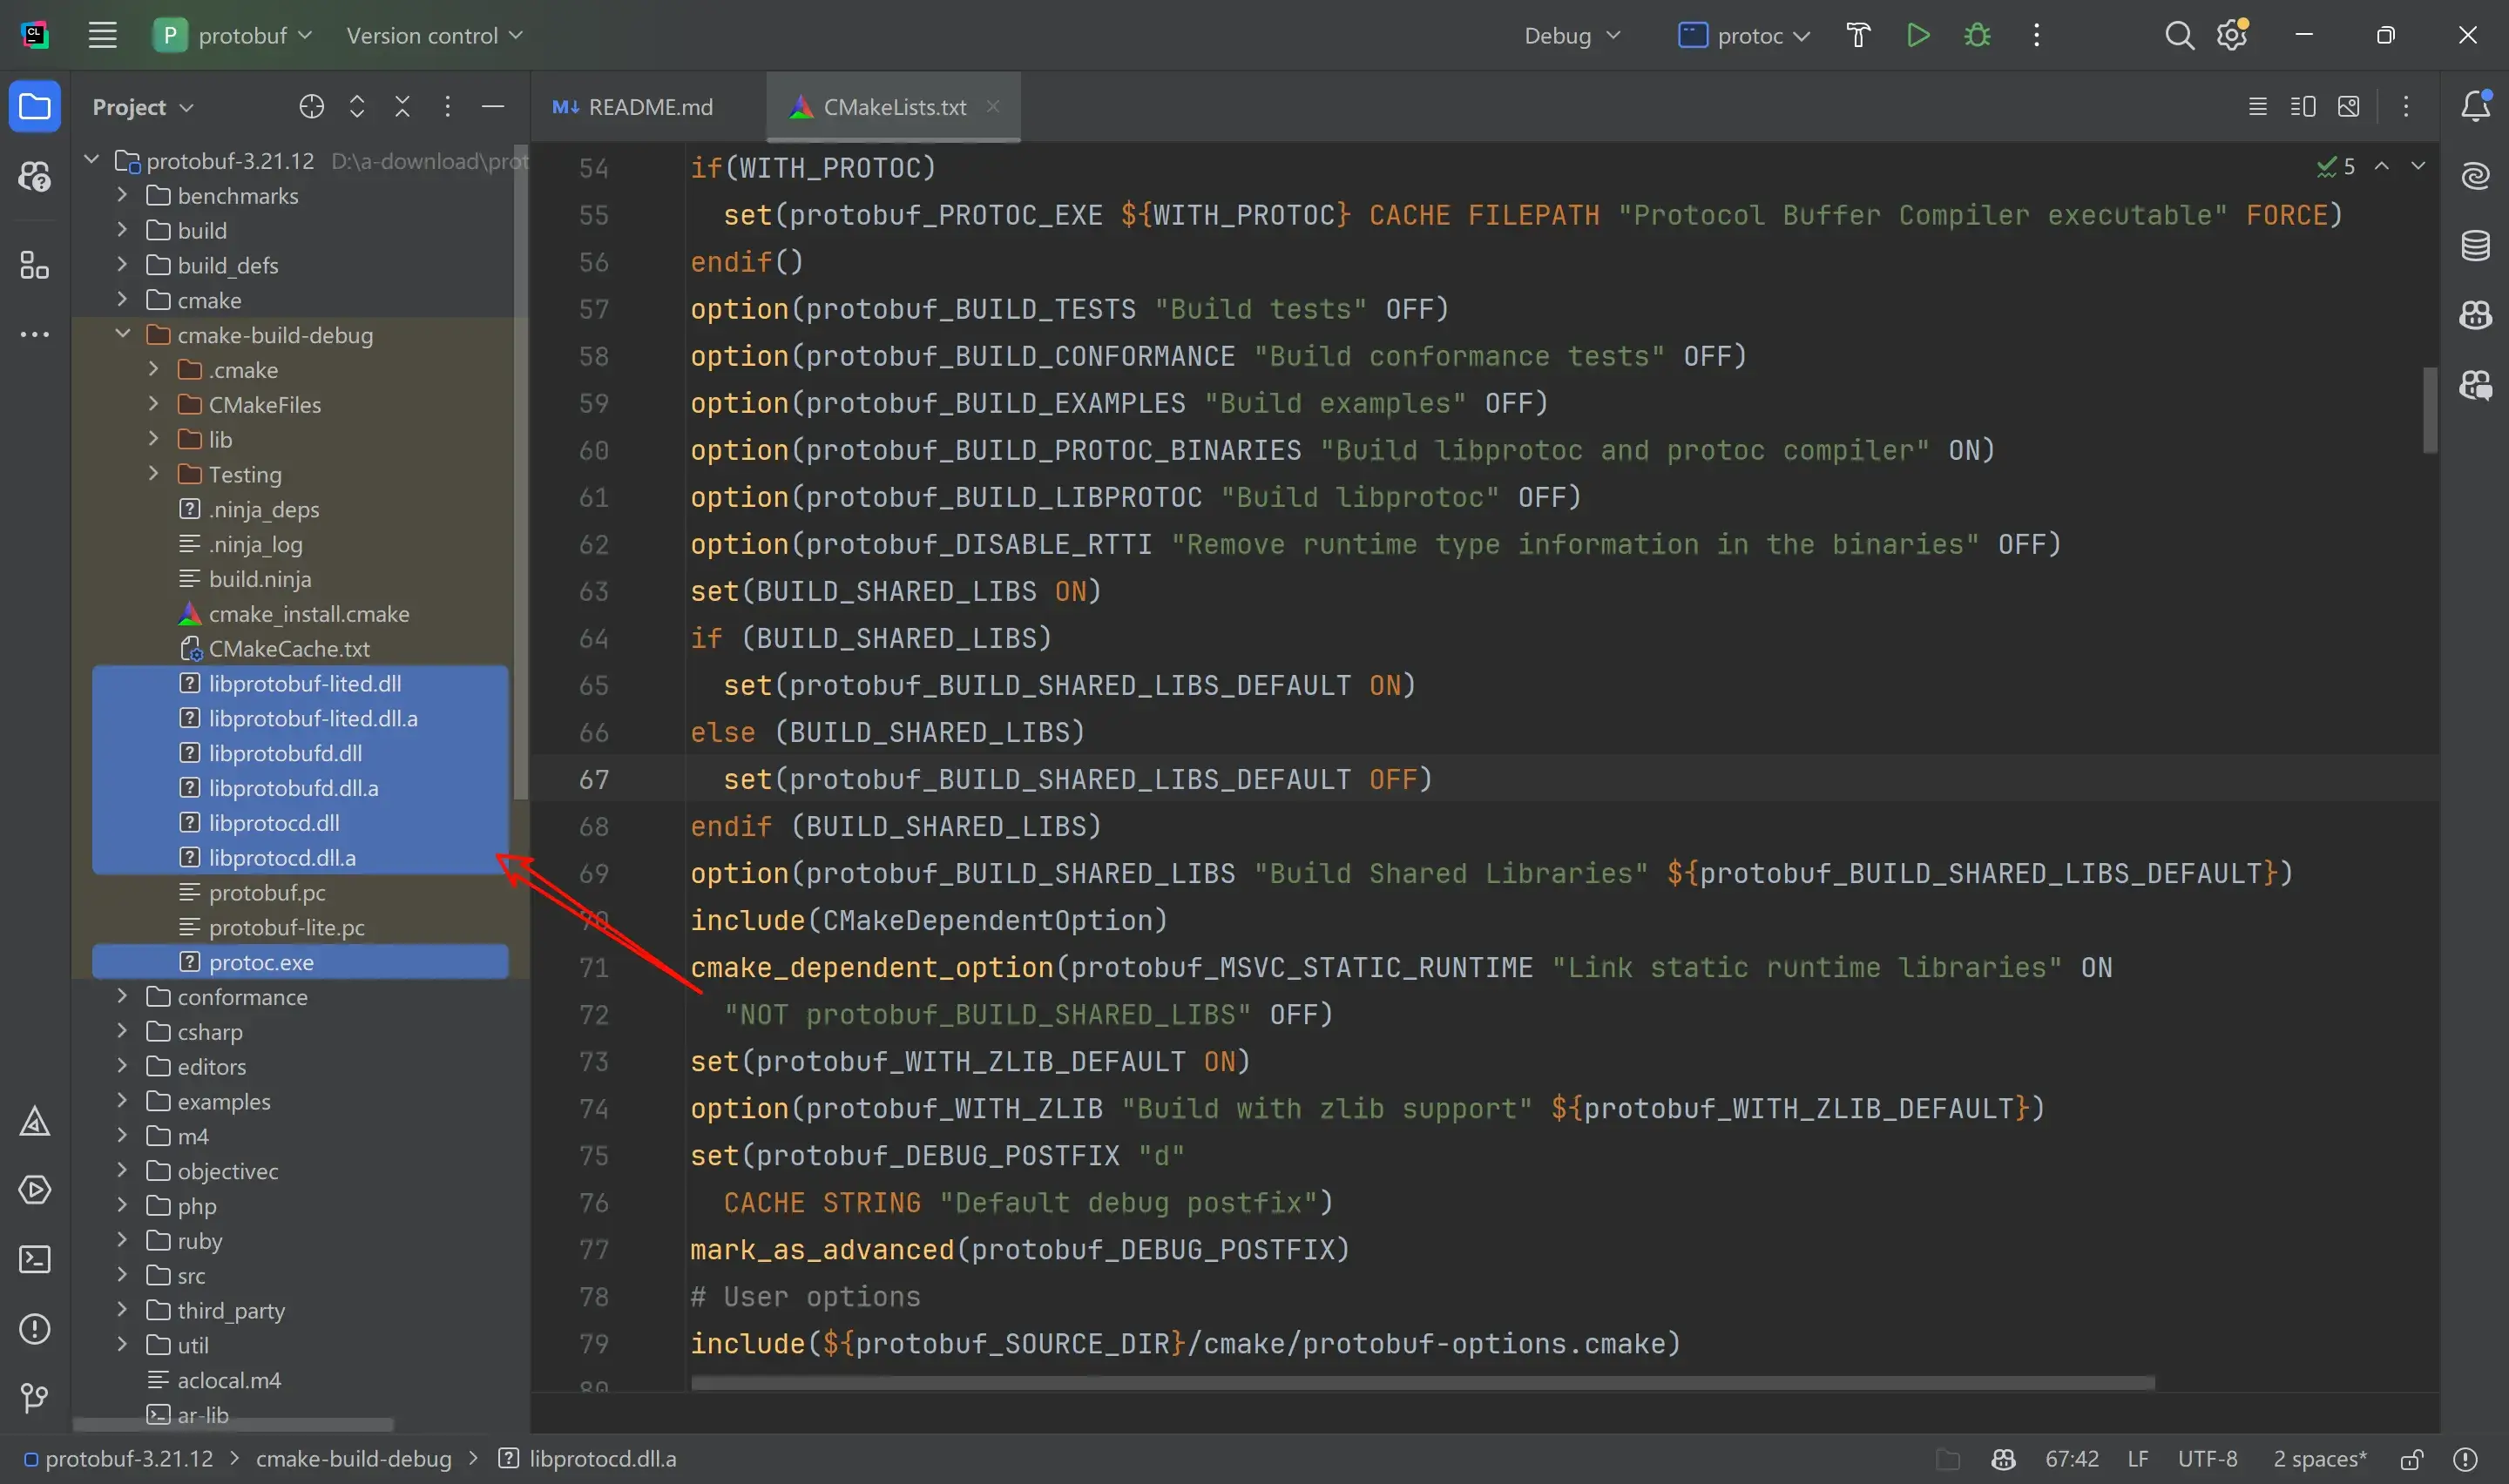
然后点击编译,然后就会生成以下几个文件,将文件拷贝出来

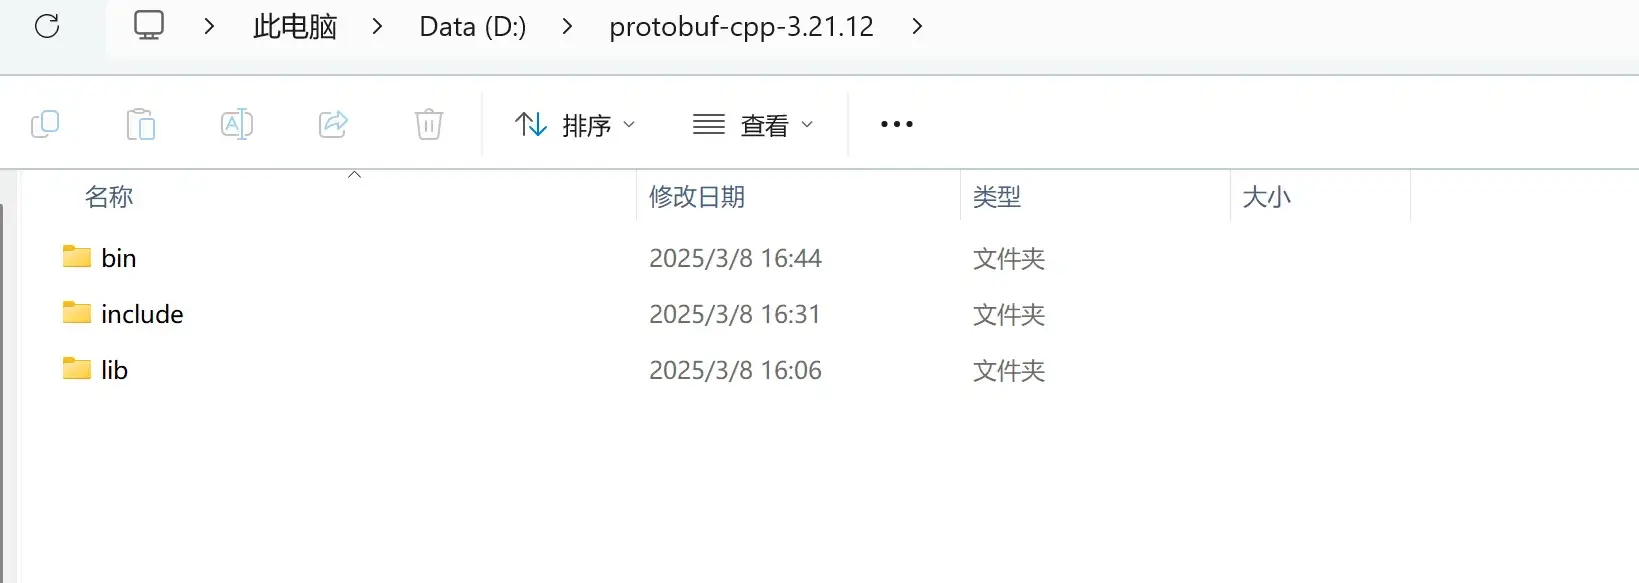
自己找一个存放protobuf库的目录,用于存放这几个文件

bin:将三个dll文件和exe文件都放在这个目录
lib:将另外三个dll.a文件放在这个目录
include:可以直接拷贝源代码中的src目录下的google目录,但是源代码目录下会有源文件,如果有洁癖,可以在linux目录下拷贝打包一份(默认你已经在ubuntu上手动编译安装protobuf),执行以下命令
cd /usr/local/include
sudo tar zcvf google.tar.gz google/
将压缩包传输到include目录解压即可
最后,将lib和bin目录添加到环境变量
二、在cmake中的使用
3.1 windows
set(PROTOBUF_PATH "D:/protobuf-cpp-3.21.12")
include_directories(${PROTOBUF_PATH}/include)
link_directories(${PROTOBUF_PATH}/lib)
target_link_libraries(${PROJECT_NAME} protobufd)
3.2 ubuntu
target_link_libraries(${PROJECT_NAME} protobuf)三、4、基本使用
syntax = "proto3";

package fixbug;

message LoginRequest
{
    string name = 1;
    string pwd = 2;
}

message LoginResponse
{
    int32 errCode = 1;
    string errMsg = 2;
    bool succuss = 3;
}这里的每一个message都对应着一个类,package为命名空间,相当于C++中的namespace,syntax为protobuf的版本号
其中,string常用bytes替换,即
syntax = "proto3";

package fixbug;

option cc_generic_services = true;//设置可以生成服务类

message ResultCode
{
    int32 errCode = 1;
    bytes errMsg = 2;
}

message LoginRequest
{
    bytes name = 1;
    bytes pwd = 2;
}

message LoginResponse
{
    ResultCode result = 1;
    bool succuss = 2;
}

message GetFriendListRequest
{
    uint32 userId = 1;
}

message User
{
    bytes name = 1;
    uint32 age = 2;
    enum Sex
    {
        MAN = 0;
        WOMAN = 1;
    }
    Sex sex = 3;
}

message GetFriendListResponse
{
    ResultCode result = 1;
    repeated User friend_list = 2; //列表类型
}
这样可以直接使用字节存储,不需要从string转为bytes,提高效率,使用示例
#include "test.pb.h"
#include <iostream>

using namespace fixbug;

int main()
{

    // 如果类里面包含其他类,需要使用mutable+变量名才能修改,
    // 因为变量名返回的是引用,无法修改
    // LoginResponse response;
    // ResultCode *rc = response.mutable_result();
    // rc->set_errcode(1);
    // rc->set_errmsg("调用失败");

    //如果修改的是列表,需要调用add+变量名才能修改
    GetFriendListResponse response;
    ResultCode* rc = response.mutable_result();
    rc->set_errcode(0);

    //获取修改地址
    User* user1 = response.add_friend_list();
    user1->set_name("zhangsan");
    user1->set_age(20);
    user1->set_sex(User::MAN);

    User* user2 = response.add_friend_list();
    user2->set_name("lisi");
    user2->set_age(21);
    user2->set_sex(User::WOMAN);

    std::cout << "resonse friend_list size : " << response.friend_list_size() << std::endl;

    //获取数据
    for(int i = 0; i < response.friend_list_size(); ++i)
    {
        std::cout << "name : " << response.friend_list(i).name() << '\n'
            << "age : " << response.friend_list(i).age() << '\n'
            << "sex : " << response.friend_list(i).sex() << std::endl;
    }
}

int main1()
{
    std::cout << "hello world" << std::endl;
    // 如果是一个普通的对象,直接使用set函数即可修改
    LoginRequest request;
    request.set_name("jianzhe");
    request.set_pwd("123456");
    std::string msg;

    if (request.SerializeToString(&msg))
    {
        std::cout << "msg : " << msg << std::endl;
    }

    LoginRequest parseRequest;
    if (parseRequest.ParseFromString(msg))
    {
        std::cout << "name : " << parseRequest.name() << std::endl;
        std::cout << "pwd : " << parseRequest.pwd() << std::endl;
    }

    return 0;
}
相关介绍
返回值:
- clear_result()
- 清除 result 字段的值
- 将其重置为默认值
- result() const
- 获取 result 字段的常量引用
- 只读访问,不能修改字段值
- release_result()
- 释放 result 字段的所有权
- 返回指向该字段的指针
- 调用后消息不再拥有该字段
- mutable_result()
- 获取 result 字段的可修改指针
- 允许修改字段值
- 如果字段不存在会创建默认值
- set_allocated_result()
- 设置 result 字段的新值
- 接管传入指针的所有权
- 释放原有的 result 字段
使用示例:
LoginResponse response;

// 获取只读访问
const ResultCode& code = response.result();

// 获取可修改访问
ResultCode* mutable_code = response.mutable_result();
mutable_code->set_errcode(1);

// 释放所有权
ResultCode* released = response.release_result();

// 设置新值
ResultCode* new_code = new ResultCode();
response.set_allocated_result(new_code);

// 清除值
response.clear_result();


